Mastering the Art of Adjusting Rossignol Axium 100 Ski Bindings
Table of Contents:
- Introduction
- Understanding the Rosignol Axiom 100 Bindings
- Tools Required for Adjusting the Bindings
- Setting the Toe Binding
- 4.1 Removing the Screws
- 4.2 Adjusting the Bracket
- 4.3 Determining the Boot Size Range
- 4.4 Reassembling the Binding
- Setting the Heel Binding
- 5.1 Understanding the Heel Piece
- 5.2 Adjusting the Forward Pressure
- 5.3 Checking the Proper Forward Pressure
- 5.4 Rechecking and Adjusting, if Necessary
- Setting the DIN Pressure
- 6.1 Understanding the DIN Setting
- 6.2 Using the Phillips Head Screwdriver
- 6.3 Finding the Correct DIN Setting
- 6.4 Adjusting the DIN Setting
- Recap and Final Tips
- Frequently Asked Questions (FAQs)
🎿 Adjusting Your Rosignol Axiom 100 Bindings: A Step-by-Step Guide 🎿
Are you an avid skier with a pair of Rosignol Axiom 100 bindings? Are you looking to adjust the binding settings to ensure a perfect fit and optimal performance on the slopes? Look no further! In this guide, we will walk you through the process of adjusting the binding settings on your Rosignol Axiom 100 bindings, step by step. So grab your tools and let's get started!
1. Introduction
Before we jump into the nitty-gritty of adjusting the binding settings, it is essential to understand the importance of properly set bindings. Bindings are a crucial component of your skiing equipment as they connect your ski boots to the skis, allowing for control, stability, and release in case of a fall or accident. Incorrectly adjusted bindings can lead to inefficient skiing, increased risk of injury, or even accidents on the slopes. Therefore, it is essential to follow the manufacturer's guidelines and make the necessary adjustments based on your boot size, weight, skiing ability, and other factors.
2. Understanding the Rosignol Axiom 100 Bindings
Before diving into the adjustment process, let's take a moment to familiarize ourselves with the Rosignol Axiom 100 bindings. These bindings are slightly older models, but don't let their age fool you. With the right adjustments and maintenance, they can still provide a smooth and enjoyable skiing experience. In this guide, we will focus on adjusting the toe binding, the heel binding, and the DIN pressure setting.
3. Tools Required for Adjusting the Bindings
To successfully adjust the binding settings on your Rosignol Axiom 100 bindings, you will need the following tools:
- Phillips head screwdriver (size: number three)
- Torx T25 bit
- Common flathead screwdriver
Make sure you have these tools readily available before starting the adjustment process.
4. Setting the Toe Binding
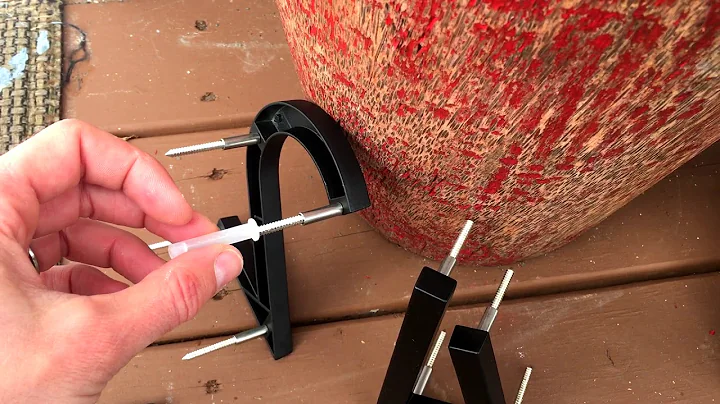
4.1 Removing the Screws
The first step in adjusting the toe binding is to remove the screws that hold the binding in place. Use a Phillips head screwdriver (size: number three) to carefully unscrew each screw, ensuring not to strip them in the process.
4.2 Adjusting the Bracket
Once you have removed the screws, you will notice a bracket underneath the binding. This bracket determines the boot size range. You can snap it into different positions to match your specific boot length. Experiment with different settings until you find the range that corresponds to your boot size.
4.3 Determining the Boot Size Range
To determine the appropriate boot size range, refer to the markings on the binding. Each range corresponds to a specific boot length. Find the range that matches your boot length and position the bracket accordingly.
4.4 Reassembling the Binding
After setting the bracket in the correct position, it's time to reassemble the binding. Align the toe piece with the screw holes and securely fasten the screws back in place. Double-check that the binding is firmly attached before moving onto the next step.
5. Setting the Heel Binding
5.1 Understanding the Heel Piece
The heel piece of the Rosignol Axiom 100 bindings requires a slightly different adjustment method. To begin, locate the small lever at the back of the binding. Using a flathead screwdriver, insert it into the designated area and twist it sideways while gently lifting the lever. This action allows you to slide the heel piece forward and backward, depending on your boot length.
5.2 Adjusting the Forward Pressure
To set the forward pressure correctly, slide the heel piece to the desired position that corresponds to your boot length. It is essential to achieve the proper forward pressure to ensure optimal performance and safety while skiing.
5.3 Checking the Proper Forward Pressure
To check the forward pressure of the heel piece, examine the small yellow window located on the binding. Inside the window, you will see a black vertical line. Ideally, this line should be positioned in the middle or slightly forward. If the line appears too far in the back, it indicates that the forward pressure is inadequate and needs adjustment.
5.4 Rechecking and Adjusting, if Necessary
If the forward pressure appears to be incorrect, go back to Step 5.2 and readjust the heel piece accordingly. It may take a few attempts to find the optimal position where the black line is centered or slightly forward.
6. Setting the DIN Pressure
6.1 Understanding the DIN Setting
The DIN setting refers to the release force required for your bindings to release your boots in case of a fall or excessive pressure. This setting depends on several factors such as skier experience, weight, height, boot width, and skiing style. It is crucial to set the DIN pressure correctly to ensure both safety and performance on the slopes.
6.2 Using the Phillips Head Screwdriver
To adjust the DIN setting, you will need your Phillips head screwdriver (size: number three). Locate the white line on the DIN window and twist the screwdriver to align the line with the desired DIN setting. The range typically varies from three to ten, depending on your specific bindings.
6.3 Finding the Correct DIN Setting
Determining the correct DIN setting can be a bit more complex. It is recommended to consult a DIN setting calculator online, taking into account factors such as skier experience, age, weight, and boot width. These calculators provide a more accurate DIN setting recommendation based on industry standards and safety guidelines.
6.4 Adjusting the DIN Setting
Once you have determined the recommended DIN setting, adjust the white line in the DIN window accordingly. Ensure that it aligns with the specified value, allowing for a safe and controlled release if needed during skiing.
7. Recap and Final Tips
To recap, adjusting the binding settings on your Rosignol Axiom 100 bindings involves setting the toe binding, the heel binding, and the DIN pressure. The toe binding is adjusted by removing screws, adjusting the bracket, and reassembling the binding. The heel binding requires adjusting the forward pressure, which can be checked through the yellow window. Lastly, the DIN pressure setting is adjusted using the Phillips head screwdriver.
Here are a few final tips to keep in mind when adjusting your bindings:
- Always refer to the manufacturer's guidelines and specifications for your specific bindings model.
- If unsure about any adjustments, seek assistance from a professional ski technician.
- Regularly inspect and maintain your bindings to ensure optimal performance and safety.
- Perform a release and retention test after adjusting the bindings to verify correct functioning.
- Adjustments may vary for different skiing styles or terrains, so consider your skiing preferences when fine-tuning the settings.
Now that you have successfully adjusted your Rosignol Axiom 100 bindings, it's time to hit the slopes and enjoy an incredible skiing experience tailored to your needs!
8. Frequently Asked Questions (FAQs)
Q1: Can I adjust the bindings on my own, or should I seek professional help?
A1: While adjusting bindings can be done by experienced skiers, it is recommended to seek professional help, especially if you are unsure or unfamiliar with the process. Professional ski technicians have the expertise to ensure accurate adjustments and maximum safety.
Q2: How often should I check and adjust my bindings?
A2: It is advisable to check and adjust your bindings at the beginning of each ski season or whenever you switch ski boots. Additionally, if you experience any changes in weight or skiing ability, it is essential to reevaluate and adjust the bindings accordingly.
Q3: Can I use these adjustment techniques for other binding models?
A3: The specific adjustment techniques mentioned in this guide are primarily tailored for the Rosignol Axiom 100 bindings. While some general principles may apply to other binding models, it is crucial to consult the manufacturer's guidelines for precise adjustments, as each binding model may have different mechanisms and settings.
Q4: How do I know if my DIN setting is correct?
A4: The recommended DIN setting depends on various factors, including skier experience, age, weight, and boot width. It is best to consult a DIN setting calculator online or seek assistance from a professional ski technician to determine the correct DIN setting for your specific circumstances.
🌐 Resources:
———————————————————
Highlights
- Adjusting your Rosignol Axiom 100 bindings is crucial for optimal safety and performance on the slopes.
- Follow the step-by-step guide to correctly set the toe binding, heel binding, and DIN pressure.
- Use the recommended tools, including a Phillips head screwdriver and Torx T25 bit, for easy adjustment.
- Consult manufacturer guidelines, online resources, or a professional ski technician for precise adjustments.
- Regularly inspect and maintain your bindings to ensure safe and enjoyable skiing experiences.
———————————————————
Have more questions? Check out our Frequently Asked Questions (FAQs) below.
Q: Can I adjust the bindings on my own, or should I seek professional help?
A: While adjusting bindings can be done by experienced skiers, it is recommended to seek professional help, especially if you are unsure or unfamiliar with the process. Professional ski technicians have the expertise to ensure accurate adjustments and maximum safety.
Q: How often should I check and adjust my bindings?
A: It is advisable to check and adjust your bindings at the beginning of each ski season or whenever you switch ski boots. Additionally, if you experience any changes in weight or skiing ability, it is essential to reevaluate and adjust the bindings accordingly.
Q: Can I use these adjustment techniques for other binding models?
A: The specific adjustment techniques mentioned in this guide are primarily tailored for the Rosignol Axiom 100 bindings. While some general principles may apply to other binding models, it is crucial to consult the manufacturer's guidelines for precise adjustments, as each binding model may have different mechanisms and settings.
Q: How do I know if my DIN setting is correct?
A: The recommended DIN setting depends on various factors, including skier experience, age, weight, and boot width. It is best to consult a DIN setting calculator online or seek assistance from a professional ski technician to determine the correct DIN setting for your specific circumstances.