Ultimate Guide to Cleaning and Calibrating Your Combo Brewer
Table of Contents
- Introduction
- Cleaning the Combo Brewer
- 2.1 Damp Cloth Rinsing
- 2.2 Removing Coffee Oils and Stains
- 2.3 De-liming the Brewer
- 2.4 Sanitizing the Spray Head
- 2.5 Replacing the Spray Head
- Checking Brew Volume and Temperature
- 3.1 Checking Current Brew Volume
- 3.2 Checking Brew Temperature
- 3.3 Calibrating Brew Volume
- 3.4 Checking Brew Volume after Calibration
- Conclusion
Cleaning and Calibrating Your Combo Brewer
🧽Are you the proud owner of a combo brewer, but are unsure about how to properly clean and maintain it? 🧼Don't worry! In this guide, we will take you through the step-by-step process of cleaning and calibrating your combo brewer to ensure that it continues to make delicious coffee for years to come.
Cleaning the Combo Brewer
2.1 Damp Cloth Rinsing
To start the cleaning process, moisten a cloth with pot and pan detergent. 🧴Using the damp cloth, gently wipe all surfaces of the combo brewer, including the exterior, back panel, sides, and front panel. This will help remove any coffee oils and stains that may have accumulated over time.
2.2 Removing Coffee Oils and Stains
For thorough cleaning, pay special attention to the spray head area. To clean this area, remove the spray head by turning it counterclockwise until it releases from the spray tube fitting. Take the damp cloth and wipe off any excess coffee oils and residue around the spray head area.
2.3 De-liming the Brewer
Mineral deposits can build up in the combo brewer over time, affecting its performance. To de-lime the brewer, insert the long end of the de-liming tool into the spray tube fitting. Rotate the tool several times to remove any mineral deposits and coffee oils. Repeat this process with the short end of the de-liming tool in the bypass fitting and each hole around the spray head openings. Remember, the spray head openings should always remain open.
2.4 Sanitizing the Spray Head
Maintaining cleanliness and hygiene is crucial in coffee brewing. Prepare a sanitizing solution by adding sanitizer to a red bucket. Place the spray head into the solution for one minute to sanitize it. After the sanitization process, remember to replace the spray head by turning it clockwise until it stops. It is important to hand tighten and not overtighten.
2.5 Replacing the Brew Funnel
Once you have completed the cleaning process, it's time to place the brew funnel back on the combo brewer. This ensures that the coffee flows smoothly and efficiently during the brewing process.
Checking Brew Volume and Temperature
3.1 Checking Current Brew Volume
Before diving into calibration, it's essential to know the current brew volume of your combo brewer. Place a pitcher with graduated ounce measurements (up to 64 ounces) under the brew funnel. Press the "Enable Brew On/Off" button and then press the brew button. Measure and note the brew volume displayed. This information will help us determine if any adjustments are necessary.
3.2 Checking Brew Temperature
Brew temperature plays a vital role in the quality of your coffee. Hold a thermometer probe under the stream of water directly under the brew funnel for at least 20 seconds. Observe the temperature reading. The proper brew temperature should be 195 degrees Fahrenheit, with a tolerance of plus or minus 5 degrees. If the temperature falls within this range, no adjustments are needed.
3.3 Calibrating Brew Volume
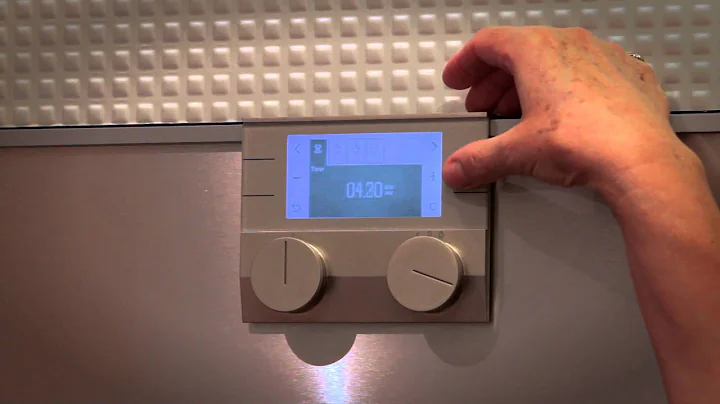
Now let's move on to calibrating the brew volume. The axiom coffee brewer has hidden buttons on the front panel for programming. Locate the first hidden button to the right of the display. Press this button to access the programming mode and scroll forward through the function list. Find and press the hidden button behind the word "Control" to select the "Calibrate Flow" option when prompted.
3.4 Checking Brew Volume after Calibration
After finishing the calibration process, recheck the brew volume. Start by pressing the "Enable On/Off Brew" button and then the brew button. Once the brew cycle is complete, measure the volume of water in the pitcher again. It should now read 64 ounces, indicating a successful calibration. If the volume is not accurate, repeat the calibration process.
Conclusion
Cleaning and calibrating your combo brewer is crucial for maintaining its performance and ensuring consistently great-tasting coffee. By following the step-by-step instructions in this guide, you can keep your brewer in top shape and enjoy delicious coffee every time you brew. Remember, a clean brewer is a happy brewer!
Highlights
- Cleaning your combo brewer ensures the longevity and performance of the machine.
- Removing coffee oils and stains is essential for maintaining the taste and quality of your coffee.
- De-liming the brewer helps remove mineral deposits that can affect the brewer's performance.
- Sanitizing the spray head is crucial for maintaining cleanliness and hygiene.
- Calibrating the brew volume and temperature ensures consistent brewing each time.
- Regularly checking the brew volume and temperature helps identify any issues with the brewing process.
FAQs
Q: How often should I clean my combo brewer?
A: It is recommended to clean your combo brewer at least once a month to ensure optimal performance.
Q: Can I use regular detergent for cleaning?
A: No, it is best to use pot and pan detergent specifically designed for cleaning coffee equipment.
Q: What should I do if the brew volume is not accurate after calibration?
A: Repeat the calibration process, ensuring that you follow each step correctly. If the issue persists, consult the manufacturer or a professional for assistance.
Q: Can I use a different sanitizing solution?
A: It is best to use a sanitizer specifically formulated for coffee equipment to ensure effective sanitation.
Q: How do I know if my combo brewer needs de-liming?
A: If you notice a decrease in water flow or irregular brewing, it may indicate the need for de-liming.
Resources:


